
Regarding the maintenance and replacement of all the following lens, clean cloth and absolute ethanol (purity > 95%) should be prepared in advance. When operating in a relatively dust-free environment (office), you need to contact the manufacturer in advance for the replacement of focusing, reflecting and collimation lens.
1、Maintenance and replacement for protective lens
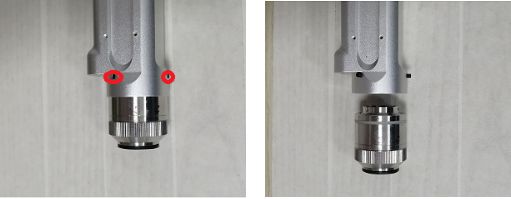
① The processing technology of laser welding requires regular maintenance of the lens. If the welding effect is found to be poor, check whether the protective lens is dirty and replace the protective lens in time.
② Before operation, please clean your hands with detergent, and use a lint-free cloth with anhydrous alcohol to clean your ordinary hands again.
③ Loosen the two screws of the protective mirror compartment cover in a relatively dust-free place (office), pull out the protective mirror bracket, cover the opening of the welding gun drawer with textured paper, and check the protective mirror in a bright place. If there is obvious black burning spot, it should be replaced immediately; if there is dust on the surface of the protective lens, use a dust-free cloth or a lint-free cotton swab to dip a small amount of anhydrous alcohol, and wipe the lens in one direction.
④ After maintenance or replacement, use a clean cloth or lint-free cotton swab dipped in a small amount of anhydrous alcohol, wipe the compartment cover and bracket, and finally insert the protective mirror bracket into the drawer opening of the welding gun, and tighten the two screws.
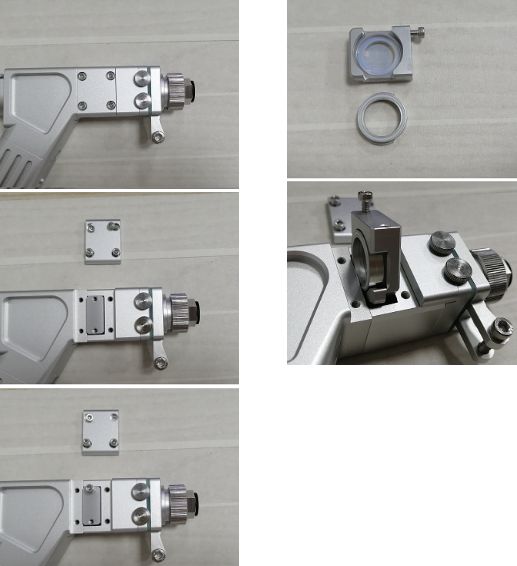
2、Maintenance and replacement for focus lens
Note: The focusing convex side faces down (that is, towards the protective lens after installation).
Steps:
1. Remove the four screws of the focus cap;
2. Screw on the focusing lens holder with a screw to take out the focusing lens holder;
3. Rotate the pressure ring and take it out;
4. Replace the focusing lens (the convex surface is downward, that is, the direction of the protective lens after installation);
5. Put back the focusing lens holder and install the cap.
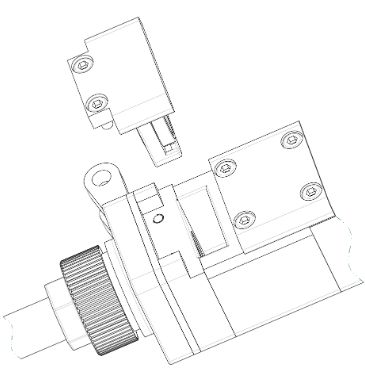
3、Maintenance and replacement for reflective lens
Step:
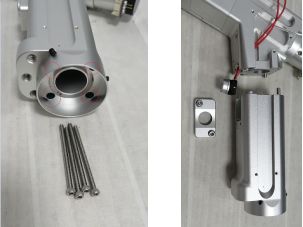
1. Remove the side cover and unplug the terminal;
2. As shown in the figure, loosen the screw of the machine, and then the motor and reflector can be taken out;
3. Place the structure horizontally, please note that the mirror and the motor itself have a certain rotatable range, and the horizontal placement can avoid the wrong installation angle as much as possible;
4. Unscrew the screws that fix the reflector, replace the new reflector and install it as it is.
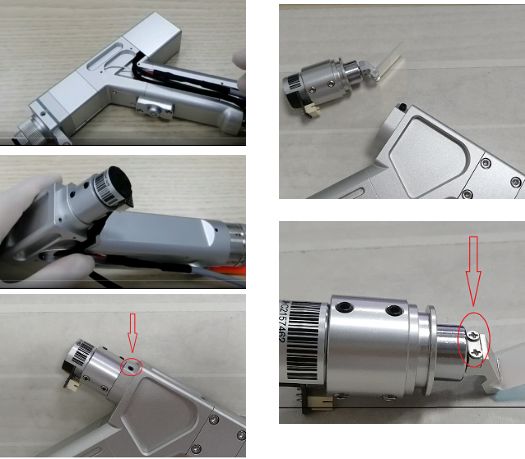
4、Maintenance and replacement for collimation lens
Note: The collimating convex side faces outward (that is, the plane faces the fiber direction after installation)
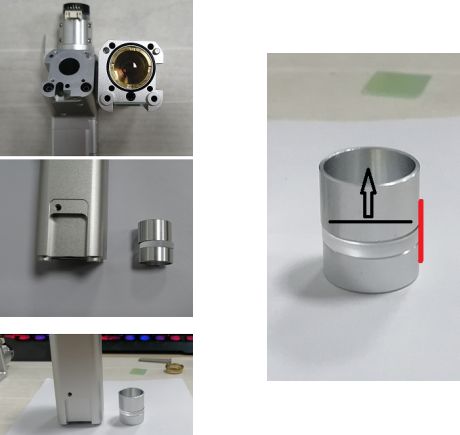
Disassembly of components:
1. Remove the side cover and the motor tail terminal;
2. Remove the QBH part (there is a jimmy screw every 120°, unscrew and pull out the QBH);
3. When installing, be sure to pay attention to the fact that the QBH has grooves, and the screws are locked in the grooves;
4. Use 2.5mm jimmy screws to remove the connecting screws (as shown in the picture);
5. Remove the button and disassemble.
Lens replacement:
If there is no special dismantling tool, temporarily use a vernier caliper to remove the locking ring counterclockwise.
Precautions and placement:
1. Locking ring - small ring - collimation lens - large ring;
2. The plane of the collimation lens faces the light-facing surface, that is, it faces upwards in the following figure;
3. When installing, place it as shown in the figure, and then put the collimation lens seat on it;
4. Restore the installation.
Post time: Jun-11-2022


